Photo Not Uploading on an Online Form? How to Fix the Format and Size
The application closes tonight, and the photo upload keeps failing: “Invalid file type.” “File size must be less than 50 KB.” “Only JPG/JPEG allowed.” Almost every one of these errors comes down to two things, the file’s format and its size, and both take about a minute to fix.
The short answer
If the form has a KB limit, open Compress to 50 KB (or 20 KB, 100 KB, 200 KB), drop your photo in and download. You get a standard .jpg under the limit, whether you started with HEIC, WebP or JFIF. (A JPG or PNG that’s already under the limit is handed back untouched.)
If it only needs a JPG, use the image converter with JPG selected. Both tools run in your browser, so your photo, signature or ID never leaves your device.
Why online forms reject your photo
Exam, job, scholarship, bank and passport portals check uploads automatically, and they’re strict. The usual causes:
| The form says | The real cause | The fix |
|---|---|---|
| “Invalid file type” or “Only JPG/JPEG allowed” | The file is HEIC (iPhone), WebP (saved from a website), PNG (screenshot) or .jfif (saved on Windows) | Convert it to JPG |
| “File size exceeds the limit” | Phone photos are 2–5 MB; forms often allow 20–200 KB | Compress it under the limit |
| “File size too small” | Some forms also set a minimum, such as 10 KB | Use a larger target, such as 50 KB instead of 20 KB |
| “Invalid dimensions” | The form wants a specific width and height in pixels | Crop or resize to the stated size first |

Step 1: Make sure it’s a real JPG
Look at the end of the file name. Upload forms want .jpg or .jpeg, and often reject everything else:
- .heic: iPhone photos. See the full HEIC to JPG guide.
- .webp: images saved from websites or WhatsApp Web.
- .jfif: a JPEG that Windows or Chrome saved with an odd extension.
- .png: screenshots and scans from some apps.
To convert, open the image converter, drop the files in, keep JPG selected and tap Convert. You can mix formats in one go.
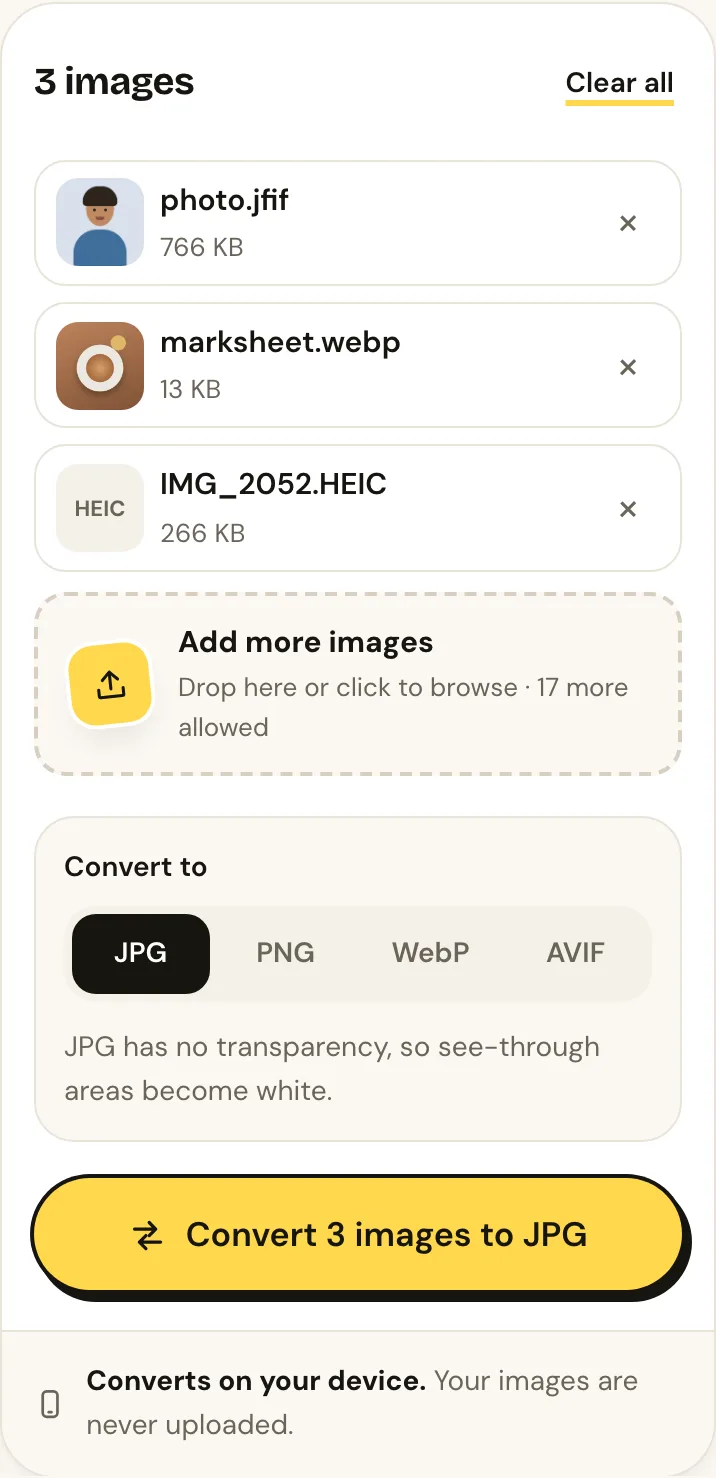
Why not just rename the file? Renaming photo.jfif to photo.jpg usually works, because JFIF is already a JPEG inside. Renaming a WebP, PNG or HEIC file doesn’t convert it: many portals check what’s inside the file and reject it anyway, or accept it and show a broken image on your application. Converting is the safe option.
Step 2: Get it under the KB limit
Most portals list their limits in the instructions, something like “photo 20–50 KB, signature 10–20 KB, JPG only”. Numbers vary by form, so always check the official notice. Then:
- Open the matching page: under 20 KB, under 50 KB, under 100 KB or under 200 KB.
- Drop your photo in. HEIC, JFIF, WebP and PNG all work.
- Tap Compress, then Compare to check the face or text is still sharp.
- Tap Download JPG.
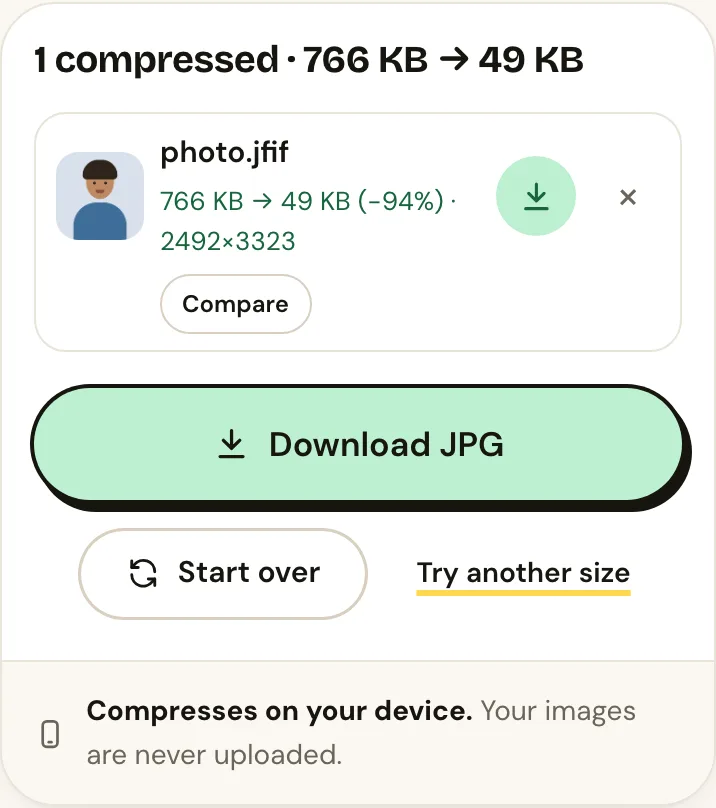
Tiny Images looks for the highest quality that fits under the limit, and only reduces the pixel dimensions when it has to. It then shows the final size and dimensions, so you know exactly what you’re uploading. Anything it has to shrink is saved as JPG, so this one step fixes both the format and the size. A JPG or PNG that already fits is handed back untouched.
Tips for very small limits
- Crop first. For a 20 KB signature, crop close to the ink so the KB go to the signature, not the empty paper around it.
- Use good light. A sharp, evenly lit photo compresses far better than a dim, grainy one.
- Don’t compress twice. Start from the original photo each time. Compressing an already-compressed file makes it blurrier.
Step 3: Check the form’s photo rules
Format and size are the technical part. Forms also have rules a converter can’t check for you: a light or white background, your face clearly visible, a recent photo, or a signature in black or blue ink on white paper. Some forms ask for exact pixel dimensions, such as 200 × 230. Crop in your phone’s photo editor to match, then compress.
Where the wrong format comes from
iPhone: photos are saved as HEIC. Safari often converts them to JPG while uploading, but not always, for example when you pick the file from the Files app or it was sent to you from another phone.
Android: images saved from Chrome or WhatsApp Web often come down as .webp. Camera photos are usually JPG already, but they’re large.
Windows: images saved from a browser sometimes end in .jfif, and screenshots are PNG. Both get rejected by strict “JPG only” forms.
Frequently asked questions
How do I change JFIF to JPG on Windows?
The quickest reliable way is the JFIF to JPG converter: drop the file in and download a .jpg. Renaming the extension in File Explorer also usually works, since JFIF is a JPEG.
Can I compress a photo to exactly 50 KB?
Forms set a maximum, so you need the file under 50 KB, not exactly 50. Tiny Images gets as close to the limit as it can, usually within a few KB, for the best quality allowed.
My photo looks blurry at 20 KB. What can I do?
Crop away the background and margins first, then compress again from the original. If the form allows it, use the 50 KB page, which leaves much more room for detail.
Is it safe to use for Aadhaar, PAN or marksheets?
Yes. StickerAI converts and compresses inside your browser, so the files are never uploaded to a server. Closing the tab clears them.