How to Compress Images for Your Website Without Losing Quality
Images are usually the heaviest thing on a web page. A single unoptimised phone photo can outweigh all of your HTML, CSS and JavaScript combined. Compress them properly and pages load faster, use less mobile data, and look exactly the same.
The short answer
Resize each image to roughly the size it’s displayed at, then run it through Tiny Images with Best balance. Check it with Compare and download. Photos typically shrink 40–70%, and screenshots and graphics 50–80%, with no visible difference. It runs in your browser, so unpublished product shots and client work stay on your device.
Why image size matters for your site
- Speed: the largest image on a page is often the element Google measures for Largest Contentful Paint (LCP), one of the Core Web Vitals. A smaller hero image means a faster LCP.
- Mobile visitors: on a patchy 4G connection, every 500 KB is a noticeable wait, and many visitors leave before a slow page finishes loading.
- Hosting and storage: lighter images mean less bandwidth, smaller backups and lower bills on hosts that charge for either.

Step 1: Resize to the size you actually show
Compression can’t fix an image that’s simply too big. A phone photo is 4000 pixels wide; a blog column is about 700–800. Upload the full photo and every visitor downloads 25 times more pixels than they see.
A good rule: make the image about twice the width it’s displayed at, so it stays sharp on high-resolution phone and laptop screens. For a full-width hero, 1600–2000 px wide is plenty. For an image in an 800 px column, about 1600 px. Most CMSs (WordPress, Shopify, Wix) also create smaller copies automatically, but they start from what you upload, so a sensible original still helps.
Step 2: Compress with Best balance
- Open Tiny Images.
- Drop up to 20 images in: JPG, PNG, WebP, AVIF or HEIC, up to 50 MB each.
- Keep Best balance selected and tap Compress.
- Tap Download. Several images download together as one ZIP.
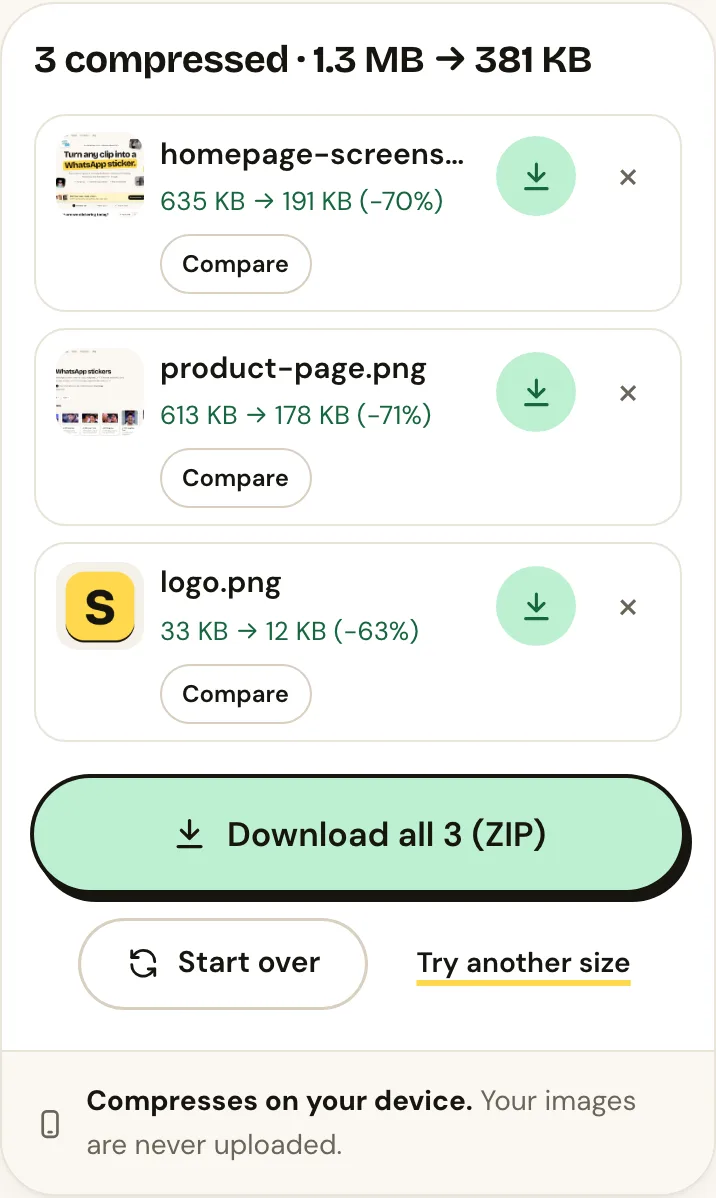
What happens under the hood depends on the format:
- JPG is re-encoded with MozJPEG, the encoder behind most JPG optimisers, and hidden camera data (EXIF) is removed. That also means location data from phone photos isn’t published with your image.
- PNG is reduced to a palette of the 256 colours that matter most, then optimised losslessly. That’s why screenshots, logos and illustrations shrink so much without visible change.
- WebP and AVIF are re-encoded at sensible quality settings.
- If an image is already as small as it can get, you get the original back. Tiny Images never hands you a bigger file.
Step 3: Check it with Compare
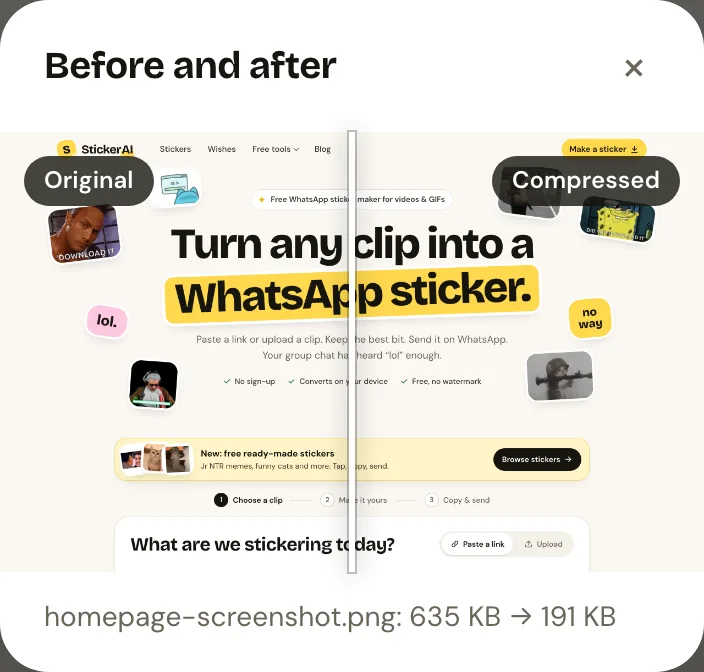
“Without losing quality” should be something you check, not something you take on trust. Tap Compare next to any file to open a before-and-after view and drag the divider across the image. Look at fine text, faces, gradients and sharp edges, the places where compression shows first.
Which format should you use?
| Image type | Best format | Why |
|---|---|---|
| Photos | WebP or JPG | WebP is usually 25–35% smaller than JPG at the same quality, and every modern browser supports it |
| Screenshots, diagrams | PNG (compressed) or WebP | Keeps text and edges crisp |
| Logos, icons | SVG, else PNG | SVG stays sharp at any size; PNG keeps transparency |
| Smallest possible | AVIF | Smallest files, but a few older apps and tools can’t open it yet |
To switch formats, use the JPG to WebP or PNG to WebP converter first, then compress if you want to go further.
A quick checklist before you publish
- Hero images under about 200 KB, in-article images under about 100 KB, where you can.
- Width set to about twice the display size, not the camera’s full resolution.
- Width and height attributes set in the HTML, so the page doesn’t jump as images load.
loading="lazy"on images below the fold, but not on the hero image.- Descriptive file names and alt text (
red-cotton-kurta.webp, notIMG_4821.jpg), which also help image search.
Frequently asked questions
Does compressing images hurt SEO?
No, it helps. Smaller images load faster, which improves Core Web Vitals and the experience for visitors. Just keep descriptive file names and alt text when you re-upload.
Is lossy compression bad?
Not at sensible settings. Best balance throws away detail you can’t see, which is why the file shrinks so much. Keep your originals, though: compressing an already compressed image again and again adds up.
Can I compress product photos for Shopify, WooCommerce or Amazon?
Yes. Compress them before uploading. Marketplaces often have their own size and dimension rules, such as a white background or a minimum width, so check those first.
Are my images uploaded anywhere?
No. Tiny Images runs entirely in your browser, so unreleased products, client work and private photos never leave your device.